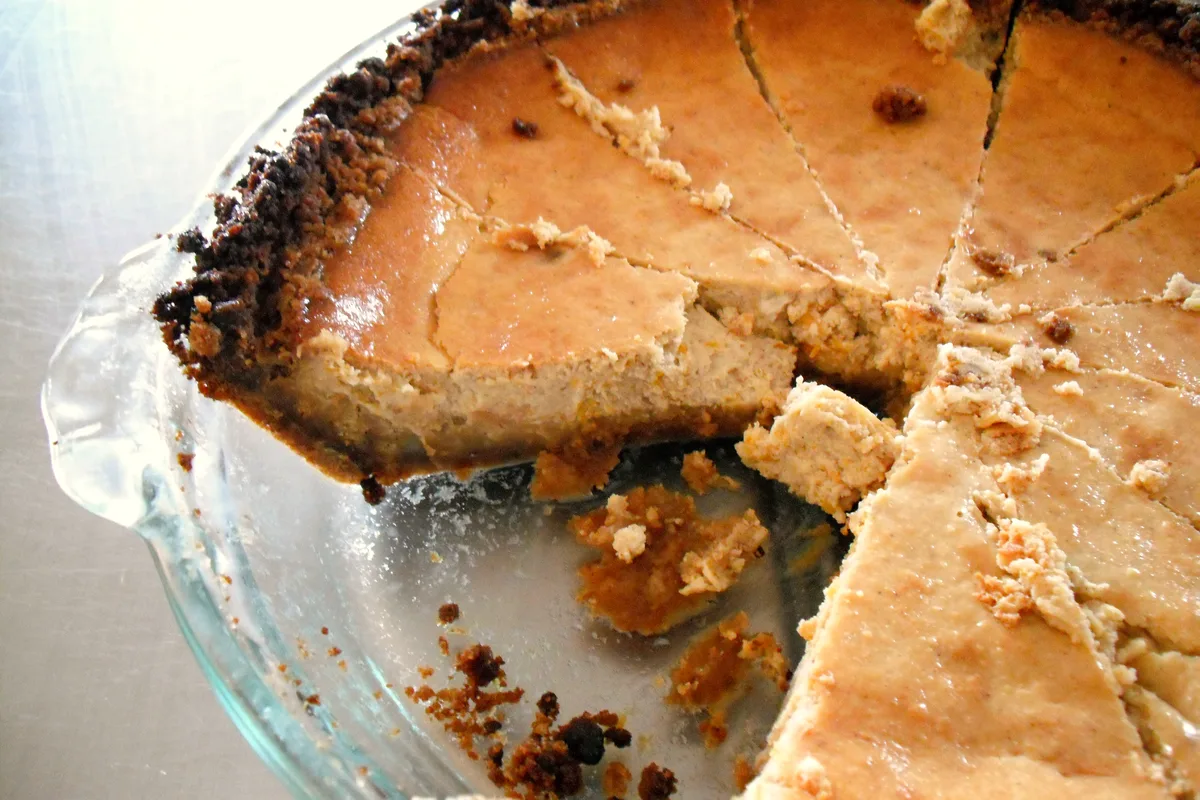
Pumpkin pie is expected at a fall table; pumpkin cheesecake is the version people ask about afterwards. It has the same warm spice and deep orange color, but the filling is richer and denser, and holds a clean slice instead of slumping on the plate. Baked in a pie dish over a gingersnap crust, it combines the best of both: a spiced crumb edge, a silky custard middle, no springform fuss.
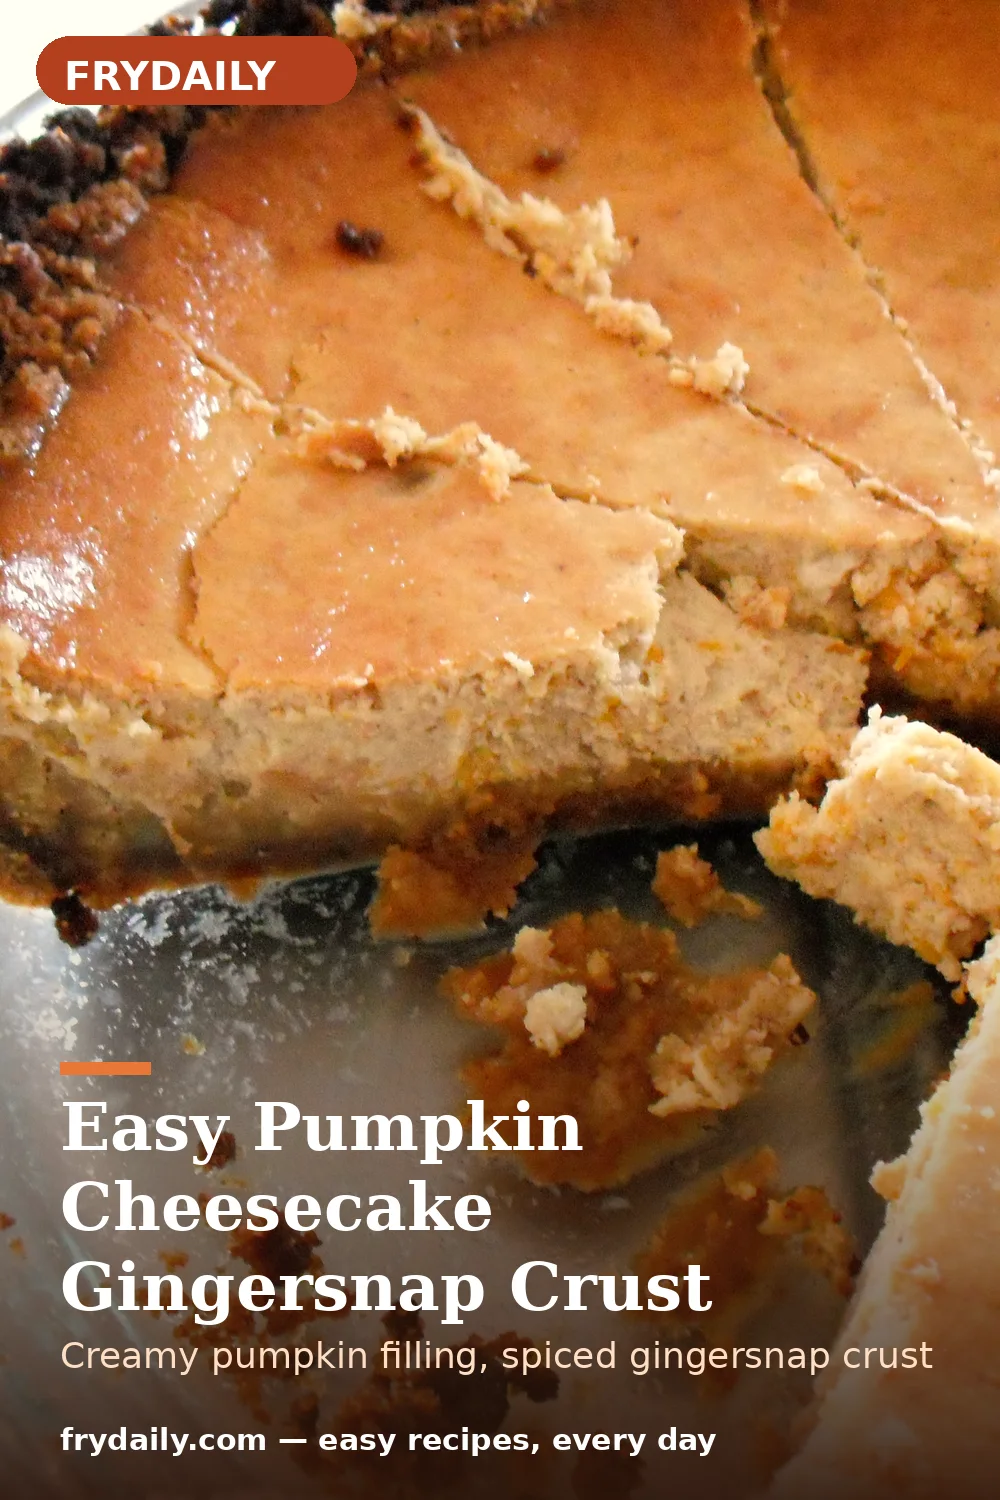
The gingersnap crust is doing real work here, not just sitting underneath. Gingersnaps bring molasses and ginger heat, so the crust tastes seasoned rather than sweet, and stays crisp against a wet filling better than plain graham crumbs. Press it firmly into a 9-inch pie dish — the kind in the photograph — and bake it briefly before the filling goes in; that ten-minute head start keeps it from turning soft.
This is also a genuinely make-ahead dessert, which is half its value in late October. It needs an overnight chill to set, so it is at its best on day two, when the spice has mellowed and the slices cut cleanly. It sits in our Desserts collection alongside our no-bake pumpkin cheesecake bars for nights you do not want the oven on, and our classic sweet potato pie for a second fall custard. One pie serves eight, and it improves for being made the day before.
Why a pie dish works (and a springform is optional)
Most cheesecake recipes insist on a springform pan, but a deep pie dish is easier, cheaper, and honestly better here. The sloped sides give you more crust in every slice, there is no pan to leak or wrap in foil, and the finished cheesecake looks like a pie. A 9-inch springform works too — same temperature, check from 50 minutes — but do not buy one specially for this. The only rule is depth: a standard 1 1/2-inch pie plate holds this filling; a shallow one will overflow.
The water bath question — and the simpler fix
You do not need a water bath for this cheesecake. Water baths exist to prevent cracking, but this filling is forgiving: a little flour stabilizes it, the eggs go in last on low speed so little air is beaten in, and the slow oven cool-down does the rest. When the baking time is up, turn the oven off, crack the door, and leave the cheesecake inside for an hour. If a crack does appear anyway, a spoonful of whipped cream hides it completely.
Ingredients
- 1 1/2 cups gingersnap cookie crumbs (150 g)
- 3 tablespoons unsalted butter, melted (42 g)
- 1 tablespoon granulated sugar (12 g)
- 1/4 teaspoon ground cinnamon (0.5 g)
- 2 (8 oz) packages cream cheese, at room temperature (454 g)
- 1 cup pumpkin puree (245 g)
- 3/4 cup granulated sugar (150 g)
- 3 large eggs, at room temperature (150 g)
- 1/2 cup sour cream (120 g)
- 1 teaspoon vanilla extract (5 ml)
- 1 1/2 teaspoons pumpkin pie spice (3 g)
- 1/4 teaspoon fine sea salt (1.5 g)
- 1 tablespoon all-purpose flour (8 g)
Amounts are for the yield below. US customary measures first, grams in brackets for scale users.
Step-by-step instructions
- Heat the oven and make the crust. Heat the oven to 350°F (177°C). Stir the gingersnap crumbs, melted butter, sugar and cinnamon until the mixture looks like wet sand. Tip it into a 9-inch pie dish and press it firmly over the bottom and up the sides with the bottom of a measuring cup — a firm, even press keeps the crust from crumbling when you slice. Bake for 10 minutes, until fragrant, then cool while you make the filling.
- Beat the cream cheese smooth. Beat the cream cheese and sugar together on medium speed for about 2 minutes, scraping the bowl once, until completely smooth. This is the only stage where vigorous beating helps: any lump left now stays in the finished cheesecake. Room-temperature cream cheese is not optional — cold cream cheese will not smooth out, so set it out an hour before you start.
- Add the pumpkin and flavorings. Beat in the pumpkin puree, sour cream, vanilla, pumpkin pie spice, salt and flour on low speed, just until combined. Use plain canned pumpkin puree, not pumpkin pie filling — pie filling is already sweetened and spiced, and will throw the recipe off. Scrape the bowl halfway through; flour hides at the bottom and a streak of it will show in the baked filling.
- Add the eggs last, gently. Add the eggs one at a time on low speed, mixing only until each one disappears. This is the step that decides whether the top cracks: eggs beaten hard trap air, which puffs the cheesecake up in the oven and collapses it as it cools. Low speed and a light hand keep the filling dense and smooth.
- Bake until the center just jiggles. Pour the filling into the baked crust and smooth the top. Bake for 50 to 55 minutes, until the edges are set but the center still wobbles gently when you nudge the dish — like set gelatin, not rippling liquid. That jiggle is correct, not underbaked; the filling firms as it cools, and a cheesecake baked until fully firm will be dry and cracked by the time it chills.
- Cool slowly, then chill overnight. Turn the oven off, crack the door open, and leave the cheesecake inside for 1 hour. Then cool it to room temperature on a rack, cover loosely, and refrigerate overnight, at least 6 hours and ideally 12. Do not rush this: a warm cheesecake cut too soon will smear instead of slicing, and the spice flavor is better on day two. Slice with a long, thin knife dipped in hot water and wiped clean between cuts.
Nutrition estimate
| Nutrient | Per serving |
|---|---|
| Calories | 385 kcal |
| Protein | 7 g |
| Carbohydrates | 38 g |
| Fat | 22 g |
| Saturated fat | 12 g |
| Sodium | 320 mg |
| Fiber | 2 g |
| Sugar | 26 g |
Nutrition figures are estimates calculated from standard ingredient data for the yield stated. Your actual values will vary with brands, substitutions and portion sizes — treat them as a guide, not a guarantee.
Storage & reheating
Cover and refrigerate for up to 5 days; the flavor is best on days two and three. Freeze individual slices, wrapped tightly in plastic wrap and then foil, for up to 1 month — thaw overnight in the refrigerator, never in the microwave, which makes the filling rubbery. Serve chilled or at cool room temperature, plain or with softly whipped cream. Nutrition figures are estimates and vary with brands and substitutions.
Easy Pumpkin Cheesecake Gingersnap Crust
Creamy pumpkin filling, spiced gingersnap crust.
Ingredients
Tick ingredients off as you prep, and tap a step below to mark it done as you cook. Scaling adjusts the listed amounts - seasoning to taste stays your call.
Instructions
- Heat the oven and make the crust. Heat the oven to 350°F (177°C). Stir the gingersnap crumbs, melted butter, sugar and cinnamon until the mixture looks like wet sand. Tip it into a 9-inch pie dish and press it firmly over the bottom and up the sides with the bottom of a measuring cup — a firm, even press keeps the crust from crumbling when you slice. Bake for 10 minutes, until fragrant, then cool while you make the filling.
- Beat the cream cheese smooth. Beat the cream cheese and sugar together on medium speed for about 2 minutes, scraping the bowl once, until completely smooth. This is the only stage where vigorous beating helps: any lump left now stays in the finished cheesecake. Room-temperature cream cheese is not optional — cold cream cheese will not smooth out, so set it out an hour before you start.
- Add the pumpkin and flavorings. Beat in the pumpkin puree, sour cream, vanilla, pumpkin pie spice, salt and flour on low speed, just until combined. Use plain canned pumpkin puree, not pumpkin pie filling — pie filling is already sweetened and spiced, and will throw the recipe off. Scrape the bowl halfway through; flour hides at the bottom and a streak of it will show in the baked filling.
- Add the eggs last, gently. Add the eggs one at a time on low speed, mixing only until each one disappears. This is the step that decides whether the top cracks: eggs beaten hard trap air, which puffs the cheesecake up in the oven and collapses it as it cools. Low speed and a light hand keep the filling dense and smooth.
- Bake until the center just jiggles. Pour the filling into the baked crust and smooth the top. Bake for 50 to 55 minutes, until the edges are set but the center still wobbles gently when you nudge the dish — like set gelatin, not rippling liquid. That jiggle is correct, not underbaked; the filling firms as it cools, and a cheesecake baked until fully firm will be dry and cracked by the time it chills.
- Cool slowly, then chill overnight. Turn the oven off, crack the door open, and leave the cheesecake inside for 1 hour. Then cool it to room temperature on a rack, cover loosely, and refrigerate overnight, at least 6 hours and ideally 12. Do not rush this: a warm cheesecake cut too soon will smear instead of slicing, and the spice flavor is better on day two. Slice with a long, thin knife dipped in hot water and wiped clean between cuts.
Recipe by Ahsan ul Haq · FryDaily. Printing? This card is designed to print cleanly on its own.